AI Chart Review User Guide
Overview
Welcome to the AI Chart Review User Guide! This document is designed to help you understand and effectively utilize AI Chart Review to streamline patient eligibility assessment for clinical trials.
With this solution, you begin by setting up your study's Inclusion/Exclusion (I/E) criteria and Prohibited Medications, which are essential factors for determining whether a patient qualifies. Once these criteria are established, you simply upload the relevant patient information. The AI will then automatically assess the data against the defined criteria, swiftly determining eligibility or flagging areas for review.
Disclaimer
The AI Chart Review tool is designed to assist in determining patient eligibility for clinical trials, but it should not be used as a replacement for the final decision-making process. We recommend that users still thoroughly review every eligibility report generated by the AI and use the tool as a one-pager "cheat sheet" to help speed up the assessment. While the AI can significantly reduce the time spent on manual review, just like human reviewers, it can occasionally miss or misinterpret certain details. Therefore, it is crucial to ensure the AI's findings are carefully reviewed for accuracy before proceeding.
How to Read the Eligibility Report
When reviewing an eligibility report, you'll find a summary of the findings at the top of the document. This section gives you a quick overview of the patient's overall status. The report is broken down into sections for Inclusion, Exclusion, and Prohibited Medications—each of which can be expanded for further detail.
.png)
Criteria Statuses
Within each section, you'll see the status of each individual criterion for the patient, which could be:
-
Eligible: This means the patient's information confirms that the criterion is met.
-
Ineligible: This indicates that the patient does not meet the criterion based on the information available.
-
Prospective - TBC: This status means that while the patient may potentially meet the criterion, further confirmation is needed. This could be due to:
-
Information needs to be collected at a future screening or visit.
-
The criterion being subject to the discretion of the Principal Investigator (PI).
-
The AI encountering conflicting information.
-
Insufficient information found by the AI to make a definitive determination.
-
AI’s Reasoning
Under the eligibility status, you’ll find a box that contains the AI's reasoning as to why the patient hits this specific criteria. This section will show the specific information the AI found that led to its decision, providing you with transparency into its assessment process.
Source
In the final box for each criterion, you'll see which document the AI used as the source of its information. This allows you to trace back the data to its original location within the patient's records.

Overall Eligibility Status
the overall eligibility status is determined by the individual criteria statuses:
-
The patient will be marked Ineligible if any criterion is marked as ineligible.
-
The patient will be marked Eligible if all criteria are marked as eligible.
-
The patient will be marked Prospective - TBC if all criteria are either eligible or prospective - TBC.

Setting Up Study I/E Criteria
Before the AI can evaluate patient eligibility, it needs to know what criteria to assess against. This is where setting up a study becomes essential. By defining the Inclusion/Exclusion (I/E) criteria and Prohibited Medications, you are teaching the AI exactly what to look for in the patient data for each study.
Steps for Setting Up a Study
1. Navigate to "Studies": Start by going to the "Studies" section in the main menu.
2. Add a New Study: Click on "Add a New Study" to initiate your setup.

3.
Option A - Manual Setup of I/E Criteria:
You can manually input the study's I/E criteria by typing them in natural language. Each criterion should be entered into its own box to ensure that the AI correctly interprets each requirement.

Option B - Upload Study Protocol PDF:
Alternatively, you can upload a Study Protocol PDF. The AI will automatically extract the I/E criteria and Prohibited Medications from the document, pre-populating the fields to save time.
Adding Instructions: For certain criteria, you can use the "Add Instruction" button to give the AI specific guidance on how to respond. A common instruction might be to always return the result "Prospective - TBC" for criteria that require later confirmation, such as those determined during a screening visit or left to the PI's discretion.


Editing Study I/E Criteria
After setting up a study, there may be times when you need to revisit and adjust the criteria to better reflect the study's needs or accommodate updates. Here's how you can do it:
1. Navigate to the Study Page: Go to the study page where you want to make edits.

2. Reference Current Criteria: To quickly see what criteria the AI is currently using to evaluate patients, click on the "Document with Magnifying Glass" Icon. This will bring up a reference view of the criteria that are currently set up for the study. Use this as a guide for what the AI is working with at the moment


3. Edit the Study Criteria: To make changes, click on the "Pencil" Icon next to the study. This will take you back into the editing mode where you can adjust the criteria and instructions as needed.
-
You can rewrite criteria to make them clearer or better aligned with your study goals, especially if the original protocol language was confusing or ambiguous.
-
Add new criteria if necessary to capture additional aspects of patient eligibility.
-
Delete any criteria that are no longer relevant or required.
-
If an updated protocol has come in with new guidelines, you can also use this section to revise the existing criteria to match the latest standards.

Tips for Setting Up Study I/E Criteria
1. Handling Criteria for Future Assessments:
If the criteria you're setting up are relevant only for information that will be collected at a later stage, such as during a screening visit, consider either deleting that criterion or adding an instruction for the AI to always respond with "Prospective - TBC." This ensures that the AI flags the criterion as something that needs to be determined later, rather than marking the patient as ineligible prematurely.
2. Aligning Criteria with the Objective of the Eligibility Analysis:
It's important that the criteria reflect the specific goal of your eligibility analysis. If the objective is to perform a full chart review of medical records, then you should include the complete set of criteria for that study. However, if the purpose is to review medical history or medication lists captured during a pre-screen (such as from a phone interview or survey), the study setup should focus only on the most critical criteria. In this case, you might place in the name of the study "Pre-Screen" to clarify that it is intended for initial pre-screen information, ensuring the AI focuses on the most relevant data to determine if the patient lead is a good fit for further evaluation.
Patient Eligibility Analysis for a Particular Study
1. Select a Study: Start by navigating to the "Studies" page and selecting the study for which you want to analyze a patient.

2. Add or Select a Patient:
-
If the patient is already in the system, you can simply select them from the list.


-
If the patient has not been previously entered into the system, you can add a new patient.


3. Upload Patient Information: When adding a new patient, you can upload their medical records or any document containing relevant patient information by either browsing your files or using drag-and-drop. This could be a downloaded patient profile from your CTMS or even notes from a pre-screen phone call.
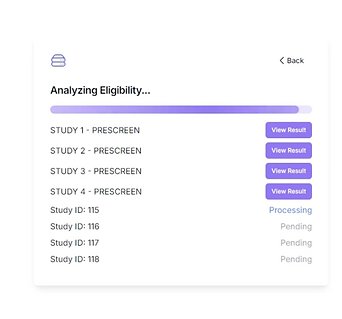
4. "Analyze": Once the patient's information is uploaded, click "Analyze." The AI will begin processing the data and conducting the eligibility analysis. The AI may take some time to complete the review depending on the volume of information.
5. View Results: When the analysis is complete, click "View Results" to review the eligibility report. It is important to go through the report thoroughly to verify the AI's findings.

6. Track Patient Eligibility Status: On the study page, you will also see a list of patients that have already been assessed by the AI. Next to each patient’s name, their eligibility status (eligible, ineligible, or prospective - TBC) will be displayed, allowing you to quickly check the results for each patient within that study.

Patient Eligibility Analysis Across Multiple Studies
1. Go to the Patient Tab: Begin by navigating to the "Patients" tab.

2. Select or Add a Patient:
-
If the patient is already in the system, select them from the list.
-
If the patient is new, add them by uploading their medical records or other relevant information.

3. Select Studies: On the patient's page, click "Select Study." A list of available studies will appear. You can then check the boxes for all the studies you want to evaluate the patient against. Click "Analyze Selected" at the top to assess eligibility across all checked Studies.


4. AI Assessment: The AI will assess the patient against the criteria of each selected study, conducting individual eligibility analyses for each.
5. Review Results: On the patient’s page, you will see a list of the selected studies, along with the eligibility status for each one (eligible, ineligible, or prospective - TBC). Clicking on any study will bring you to the detailed eligibility report specific to that study, where you can review the AI's findings and make informed decisions about the patient's suitability for each trial.

Human QA Team Review for Enhanced Accuracy
At Quri, we understand that while AI is highly accurate, it can occasionally make mistakes—just like human reviewers. That's why we have a dedicated team of medical professionals who manually review the AI's analysis results. If the AI misses or misinterprets something, our QA team will catch it and make the necessary adjustments.
If you're seeking 100% accuracy in your eligibility assessments, you can wait up to 24 hours for our human QA team to review the results. Any updates or corrections made by our experts will automatically be reflected in the eligibility report, ensuring that you have the most accurate information possible for your study decisions.
Settings
To manage your account settings, navigate to the "Profile" page from the main menu. Here, you can update your profile information, enable multi-factor authentication for added security, and update your email and password as needed.
For team management, head over to the "Organization" tab. From here, you can invite team members to join your organization, ensuring that your entire team has access to the AI chart review tool.